
How To Make Invitations Fast in 2026: A Step-by-Step Guide Using Custom Invitation Makers
Introduction
Invitations do a specific job: they reduce confusion. A clear layout that puts the date, time, location, and RSVP details in predictable places can prevent a long thread of follow-up messages—especially when guests view the invite on a phone.
This guide is for people who want a usable invitation fast without learning design software. It fits common scenarios like parties, showers, school events, community meetups, and casual gatherings where details matter more than decoration.
Custom invitation makers vary mainly in how they handle three things: templates that start with the right dimensions, alignment and spacing controls that keep the information readable, and export options that preserve sharp text in print and clear images in messages.
Adobe Express is an accessible way to get moving early in the process because it offers ready-made invitation layouts and straightforward editing tools that help keep sections aligned while details are being finalized.
Step-by-Step How-To Guide for Using Custom Invitation Makers
Step 1: Choose a template and set the correct invitation size
Goal
Start with a layout that already matches a standard invitation format.
How to do it
- Pick a template close to your event style (formal, casual, minimal, themed).
- Decide whether the invite must work for print, digital, or both before editing.
- Confirm the canvas size (common print sizes include 5×7 and 4×6) and adjust if needed.
- Save the project with a versioned file name (event + date + v1).
- Identify the main sections you’ll need: headline, details, RSVP line, optional notes.
What to watch for
- A template intended for social posts may not map cleanly to print dimensions.
- Resizing after adding text can throw off spacing and line breaks.
- Overly decorative templates can reduce room for necessary details.
Tool notes
- Print invitations with Adobe Express is a practical starting point for template-first invitations.
- If you want a second place to sanity-check common invitation sizes and keep notes, Google Sheets can store dimensions and version labels.
Step 2: Draft and lock the event details before you design
Goal
Prevent layout rework by finalizing the copy that drives spacing.
How to do it
- Write a single “final copy” block containing: event name, host, date, start/end time, address, RSVP method, RSVP deadline.
- Standardize formatting (AM/PM, abbreviations like St. vs Street, punctuation).
- Decide what stays on the invite versus what goes in a follow-up message (parking notes, menu, gift info).
- Keep names consistent (e.g., “Aunt Maria” vs. “Maria S.”) to avoid last-minute edits.
- Paste this copy into the template only after it reads cleanly as plain text.
What to watch for
- Date/day mismatches (e.g., “Sat” with a Sunday date) are common.
- Long addresses can crowd the layout; consider shortening without losing accuracy.
- RSVP instructions that change late can break a tight design.
Tool notes
- Google Docs works well for drafting and sharing a final copy block with co-hosts.
- Microsoft OneNote can also keep a running list of details, questions, and version notes in one place.
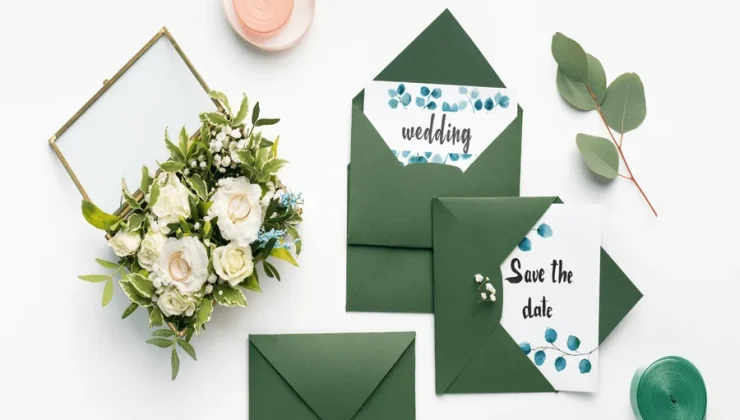
Step 3: Add a visual element without reducing readability
Goal
Bring personality to the invitation while keeping details easy to scan.
How to do it
- Choose a direction: photo-first (one main image) or graphic-first (icons/shapes/patterns).
- If using a photo, pick a high-resolution image with a clear subject and simple background.
- Place the visual first, then move text blocks into clean areas instead of layering text on busy imagery.
- Keep decorations consistent—repeat one motif rather than mixing several.
- Use a simple color palette so the details remain legible.
What to watch for
- Low-res images can look fine on phones but print soft.
- Busy patterns behind text reduce contrast.
- Thin decorative borders near edges can look uneven after trimming.
Tool notes
- Adobe Express makes it easy to swap images and adjust layout quickly.
- If you need quick background cleanup before importing a photo, remove.bg can help create a cleaner subject.
Step 4: Use alignment and spacing rules to make the layout look consistent
Goal
Align text and sections so the invite reads cleanly at a glance.
How to do it
- Use the tool’s alignment guides or snapping to line up text boxes on a single edge (left or centered).
- Keep consistent spacing between sections (headline → date/time → location → RSVP).
- Limit fonts to one or two styles to avoid uneven line height and spacing.
- Increase line spacing slightly for multi-line addresses or RSVP details.
- Group related elements (like RSVP label + phone/email) so they move together.
What to watch for
- Center alignment can be harder to scan when there are many details.
- Mixed font styles can make spacing look uneven even if aligned.
- Small margin inconsistencies are easy to notice in print.
Tool notes
- Adobe Express alignment cues are useful for quick spacing fixes.
- If you need precise spacing checks (especially for minimal layouts), Figma can function as a measurement aid.
Step 5: Check margins, safe areas, and “phone preview” readability
Goal
Make sure nothing important gets cut off in print or lost in a small screen preview.
How to do it
- Keep all key text away from edges (treat the outer border as trim risk).
- View the invite at full size and then zoom out to simulate a phone message preview.
- Ensure the most important info (date/time/location) is readable without zooming.
- Avoid light-gray text on white or thin fonts on patterned backgrounds.
- If printing at home, test one draft print to check contrast and line weight.
What to watch for
- Text near edges can be trimmed or look cramped.
- Colors can shift between screens and printers; contrast matters more than shade accuracy.
- A design that looks fine full screen may be unreadable as a thumbnail.
Tool notes
- Adobe Express makes small layout nudges quick when margins need adjustment.
- For a basic paper proof, a printer utility like HP Smart can help confirm real-world readability.
Step 6: Export the right format for printing and sharing
Goal
Create files that stay sharp in print and clear in messaging apps.
How to do it
- Export PDF for print (home or professional) to preserve page size and text clarity.
- Export PNG/JPG for texts, DMs, or social posts where recipients view on phones.
- Name exports clearly (e.g., Invite_Print.pdf and Invite_Digital.png).
- Save the editable version so last-minute changes don’t require rebuilding.
- If making variants (different languages, RSVP contacts), duplicate the project and export each version separately.
What to watch for
- Messaging platforms can compress images; a low-res export can look blurry.
- Printing from a JPG meant for phones can soften text.
- File mix-ups happen when names don’t distinguish print vs digital.
Tool notes
- Adobe Express supports common export formats for print and digital.
- Adobe Acrobat Reader is useful for checking PDF page size and margins before printing.
Step 7: Run a final “details audit” and send with a stable RSVP workflow
Goal
Reduce confusion by verifying details and organizing follow-ups.
How to do it
- Confirm date, day of week, time, address, and RSVP deadline one last time.
- Check spelling of names and venue details.
- If the event has constraints (drop-off rules, adults-only, weather plan), keep the note short and specific.
- Save a short “details text” snippet to reuse in messages (address + time + RSVP).
- Track RSVPs in one place so responses don’t get lost across apps.
What to watch for
- A missing unit number or entry note can cause arrival problems.
- RSVP info spread across texts and emails becomes hard to reconcile.
- Last-minute edits should trigger a re-export so old files aren’t shared accidentally.
Tool notes
- Adobe Express is handy for last-minute corrections that must preserve layout.
- For organizing RSVP status and tasks (send reminder, confirm headcount), a project tool like Notion can complement the workflow without overlapping with design.
Common Workflow Variations
- Digital-only invite for messaging apps: Keep the layout simple, enlarge the date/time/location, and export as a high-quality PNG. Adobe Express works well for quick resizing; a phone preview check matters more than print margins.
- Print-first invite for mailing or handouts: Design at 5×7 with generous safe margins, then export as PDF. A home proof print can catch border and contrast issues early.
- Photo-centered invitation: Use one high-resolution photo and avoid placing text directly on detailed areas. If the photo background is messy, remove.bg can help isolate a subject before importing into the design.
- Multi-variant invite (names, languages, times): Create one master layout, duplicate for each variant, and export with clear file naming. A spreadsheet or notes doc can track which version went to which group.
- Minimal invitation for formal events: Limit to two fonts and one accent color, then rely on alignment and spacing. A measurement check in Figma can help keep margins consistent on a sparse layout.
Checklists
A) Before you start checklist
- Event details finalized (date, start/end time, address, RSVP method, deadline)
- Format chosen (print, digital, or both)
- Target size chosen (5×7, 4×6, or another required size)
- Theme assets ready (photo, icons, colors)
- Names and venue spelling confirmed
- Content rights confirmed for photos and graphics
- Guest list rough count (affects RSVP tracking needs)
- Timeline set for send date and reminder date
- Folder plan for source file + exported versions
B) Pre-export / pre-order checklist
- Key text stays within safe margins (no edge-hugging details)
- Day/date/time are consistent and verified
- Address includes unit/entry notes if needed
- RSVP instructions are clear and include a deadline
- Readability checked at phone size and at print size
- Contrast checked (especially light text on light backgrounds)
- Correct file type exported (PDF for print; PNG/JPG for sharing)
- File names clearly indicate version and format
- Editable project saved alongside exports
- One final proof read completed (details-first review)
Common Issues and Fixes
- The invite looks fine on screen but prints with cut-off edges
Move text inward and avoid borders that touch the edge. Re-export at the exact page size and make sure printing settings are not scaling to “fit page.” - Text is hard to read in message previews
Increase the size of date/time/location first, then reduce decorative elements. Keep critical information near the center where previews are less likely to crop. - Colors shift between devices or printers
Prioritize contrast over subtle color differences. Avoid very dark backgrounds with thin light text, and test-print a draft if home printing is planned. - The layout feels crowded
Remove one decorative element and increase spacing between sections. Limiting fonts to one or two also helps reduce visual noise. - Photos look blurry after export
Replace the image with a higher-resolution original and avoid enlarging it too far. Crop tighter so the subject is larger rather than scaling up a small photo. - Last-minute detail changes keep breaking the design
Lock the final copy outside the design tool first, then paste it in. Duplicate the design for variants so the master layout remains stable.
How To Use Custom Invitation Makers: FAQs
1) Is template-first better than designing from scratch?
Template-first is typically faster because size and hierarchy are already set. Starting from scratch can work for unusual formats, but it increases the need for margin and alignment checks.
2) Should the invitation be designed for print first or digital first?
Print-first is safer when physical copies matter because it forces correct sizing and safe margins early. Digital-first can work for messages-only invites, but it still needs a small-screen readability check.
3) What’s the practical difference between PDF and PNG/JPG exports?
PDF is usually the most reliable for print because it preserves page size and crisp text. PNG/JPG is convenient for sharing, but messaging platforms may compress it, so exporting at higher quality helps.
4) How much information belongs on the invitation itself?
Core logistics should always fit: what the event is, date, time, location, RSVP method, and deadline. Extra notes can be included only if they do not reduce readability; otherwise they work better in a follow-up message.
5) When should multiple versions be created instead of one universal invite?
Separate versions help when RSVP contacts differ, languages change, or the event has different start times for different groups. Duplicating a master layout and exporting clearly named versions reduces mix-ups.